B2B Single Sign-On & SAML
Organizations are only available in Ory Network and are not supported in self-hosted Ory Kratos. If you have any questions, or if you would like more information about transitioning to Ory Network, please don't hesitate to reach out.
Organizations are a way to group users within one project. An organization always belongs to one Ory project. Within a project, an identity can belong to an organization or remain without an organization. Organizations contain multiple OIDC SSO connections. All members of an organization must use one of the organization's OIDC SSO connections to log in.
An organization can have multiple domains. Registrations for email addresses with a domain that belongs to an organization must go through one of the organization's OIDC SSO connections.
Some identity providers do not validate email domain ownership. This can lead to situations where Enterprise SSO with
Organizations is configured for a specified domain such as @example.com, but due to this lack of this email domain ownership
validation by the identity provider, a users with other email domains such as @gmail.com can still authenticate successfully via
the identity provider.
This will end up with the user being part of the configured organization in your Ory project, even if the domain does not match any of the configured domains.
Organizations require identifier-first authentication and two-step registration when using Account Experience 2.x or Ory Elements 1.x.
Manage organizations
- Ory Console
- API
To create, update, or delete organizations via the Ory Console, go to
Authentication → Enterprise SSO in the Ory Console.
Organizations can also be managed using the Ory API. To authenticate your requests, create a workspace API key.
All examples below use curl to make HTTP requests. You can use any HTTP client to make these requests.
Before copy & pasting the following examples, export your PROJECT_ID and WORKSPACE_API_KEY:
export PROJECT_ID="..."
export WORKSPACE_API_KEY="ory_wak_..."
List organizations
curl -X GET --location "https://api.console.ory.sh/projects/$PROJECT_ID/organizations" \
     -H "Authorization: Bearer $WORKSPACE_API_KEY"
Create an organization
curl -X POST --location "https://api.console.ory.sh/projects/$PROJECT_ID/organizations" \
     -H "Authorization: Bearer $WORKSPACE_API_KEY" \
     -H "Content-Type: application/json" \
     -d '{
           "label":  "Hello demo",
           "domains": ["test.example.com"]
         }'
Get an organization
curl -X GET --location "https://api.console.ory.sh/projects/$PROJECT_ID/organizations/$ORGANIZATION_ID" \
     -H "Authorization: Bearer $WORKSPACE_API_KEY"
Delete an organization
curl -X DELETE --location "https://api.console.ory.sh/projects/$PROJECT_ID/organizations/$ORGANIZATION_ID" \
     -H "Authorization: Bearer $WORKSPACE_API_KEY"
Create SSO connections for an organization
After creating an organization, continue by adding one or more SSO OIDC connections.
- Ory Console
- API
Go to Authentication → Enterprise SSO in the Ory Console and continue by configuring the selected organization.
The SSO connections are part of the project configuration. To authenticate, use the same workspace API key as for managing organizations. The examples use curl to make HTTP requests and jq to parse JSON response.
Create an SSO connection
curl -X PATCH --location "https://api.console.ory.sh/projects/$PROJECT_ID" \
     -H "Authorization: Bearer $WORKSPACE_API_KEY" \
     -H "Content-Type: application/json" \
     -d '[
           {
             "op": "add",
             "path": "/services/identity/config/selfservice/methods/oidc/config/providers/-",
             "value": {
               "client_id": "...",
               "client_secret": "...",
               "id": "ory-GPx1yPH4",
               "issuer_url": "https://example.org",
               "label": "My OIDC provider",
               "mapper_url": "base64://ZnVuY3Rpb24oY3R4KSBjdHg=",
               "organization_id": "6bb1c7d1-3b3e-4995-9e09-35649dc45a2b",
               "provider": "generic",
               "pkce": "auto", # or "force", "never", see note on redirect URL below
               "scope": ["openid", "offline_access", "email"]
             }
           }
         ]' \
   | jq ".project.services.identity.config.selfservice.methods.oidc.config.providers"
Some notes on the fields of the JSON payload:
client_idandclient_secretare the credentials of the OIDC provider.idis a unique identifier for the connection, and part of the redirect URL, and can be a random string. This is$PROJECT_IDbelow.organization_idis the ID of the organization to which the connection belongs, and part of the redirect URL. This is$ORGANIZATION_IDbelow.mapper_urlis the URL to a JSONnet file that maps the OIDC provider's claims to Ory's identity schema. You can use thebase64scheme to embed the JSONnet file directly in the JSON payload.pkcedetermines whether Ory Identities will use PKCE during the OIDC flow. See the note below and the PKCE documentation for details.
The redirect URL to be set in the external OIDC provider's configuration is
https://$PROJECT_SLUG.projects.oryapis.com/self-service/methods/oidc/organization/$ORGANIZATION_ID/callback/$PROVIDER_ID.
If you set pkce: force, you must whitelist a different redirect URL with the OIDC provider:
https://$PROJECT_SLUG.projects.oryapis.com/self-service/methods/oidc/callback.
See the PKCE documentation for details.
List SSO connections
curl -X GET --location "https://api.console.ory.sh/projects/$PROJECT_ID" \
     -H "Authorization: Bearer $WORKSPACE_API_KEY" \
   | jq ".services.identity.config.selfservice.methods.oidc.config.providers"
Result:
[
  {
    "client_id": "...",
    "client_secret": "...",
    "id": "ory-GPx1yPH4",
    "issuer_url": "https://example.org",
    "label": "My OIDC provider",
    "mapper_url": "https://storage.googleapis.com/bac-gcs-production/94292215dbabe405bebff988b5356663fcf5cba35b10fc6ca2cfea7bc7049e906e01d271a3daeb844203efdfbf2cff356274daa63d5afc2a379bbe93b8b40e63.jsonnet",
    "organization_id": "6bb1c7d1-3b3e-4995-9e09-35649dc45a2b",
    "provider": "generic",
    "scope": ["openid", "offline_access", "email"]
  }
]
Delete an SSO connection
To delete an organization, you need to specify the index of the connection in the path field. The index is the position of the
SSO connection in the list of connections.
curl -X PATCH --location "https://api.console.ory.sh/projects/$PROJECT_ID" \
     -H "Authorization: Bearer $WORKSPACE_API_KEY" \
     -H "Content-Type: application/json" \
     -d '[
           {
             "op": "remove",
             "path": "/services/identity/config/selfservice/methods/oidc/config/providers/0"
           }
         ]' \
   | jq ".project.services.identity.config.selfservice.methods.oidc.config.providers"
Note that the organization_id field contains the organization ID to which the connection belongs.
See it live
After having set up everything, go to your registration page. Entering an email that ends with the organization's domain, such as
@my.example.com from the example above, shows a Sign in with SSO button instead of the password field. Clicking it will take
you to sign in with the SSO connection. The SSO connection is not visible for email addresses that are not managed by the
organization.
Pre-provisioning identities in an organization
After creating an organization, you can pre-provision identities in it. This is useful when you need to create related data in your system but need the identity to be created in Ory Network first, before the user logs in for the first time.
To achieve this, set the organization_id property to the ID of the created organization in the identity, either when creating
the identity, or by updating the identity's data using the Ory APIs.
SAML
SAML (Security Assertion Markup Language) is an XML-based open standard used for exchanging authentication and authorization data between parties. The SAML integration in Ory Network uses the B2B Organization feature.
SAML via Ory Network
This guide will walk you through the steps required to set up SAML Single Sign-On (SSO) with Ory Network.
Prerequisites
Before proceeding, ensure you are on a plan that supports SAML SSO. SAML is available exclusively on select Enterprise plans. Contact us if you need SAML support.
- Ory Console
- API
- Go to Authentication → Enterprise SSO in the Ory Console to create an organization.
- Select "Add a new Enterprise SAML SSO connection" and follow the instructions to configure the SAML connection. Fill out the following form fields:
- Label: A descriptive name for the SAML connection. This will be displayed to users.
- Data mapping: A mapping from the SAML attributes to Ory's identity schema.
- Raw IDP metadata XML: The XML metadata file from your SAML Identity Provider (IdP).
- Navigate to your login screen to test the SAML connection.
Create an organization
curl -X POST --location "https://api.console.ory.sh/projects/$PROJECT_ID/organizations" \
     -H "Authorization: Bearer $WORKSPACE_API_KEY" \
     -H "Content-Type: application/json" \
     -d '{
           "label":  "SAML organzation",
           "domains": ["example.com"]
         }'
Enable SAML authentication
curl -X PATCH --location "https://api.console.ory.sh/projects/$PROJECT_ID" \
     -H "Authorization: Bearer $WORKSPACE_API_KEY" \
     -H "Content-Type: application/json" \
     -d '[
           {
             "op": "replace",
             "path": "/services/identity/config/selfservice/methods/saml/enabled",
             "value": true
           }
         ]' \
   | jq ".project.services.identity.config.selfservice.methods.saml"
Create a SAML connection
curl -X PATCH --location "https://api.console.ory.sh/projects/$PROJECT_ID" \
     -H "Authorization: Bearer $WORKSPACE_API_KEY" \
     -H "Content-Type: application/json" \
     -d '[
           {
             "op": "add",
             "path": "/services/identity/config/selfservice/methods/saml/config/providers/-",
             "value": {
               "id": "some-provider-id",
               "label": "My SAML provider",
               "mapper_url": "base64://...",
               "raw_idp_metadata_xml": "base64://...",
               "organization_id": "$ORGANIZATION_ID"
             }
           }
         ]' \
   | jq ".project.services.identity.config.selfservice.methods.saml"
- label: A descriptive name for the SAML connection. This will be displayed to users.
- mapper_url: A mapping from the SAML attributes to Ory's identity schema.
- raw_idp_metadata_xml: The XML metadata file from your SAML Identity Provider (IdP).
The SAML application callback URL to set at our SAML Identity Provider is: https://api.console.ory.sh/saml/api/oauth/saml
Data mapping
You can configure the mapping of SAML attributes to Ory's identity schema using Jsonnet. All custom SAML attributes defined at the
Identity Provider (IdP) will be available in the raw_claims object within claims. These attributes can then be mapped to the
Ory identity schema.
Ensure that the appropriate identity schema is created before mapping attributes. The email attribute is natively available in
claims.email, everything else is nested under claims.raw_claims.
Example SAML data mapping
Mapping firstName and lastName from the SAML Identity Provider to the Ory identity schema (traits).
local claims = std.extVar('claims');

{
  identity: {
    traits: {
      email: claims.email,
      [if std.objectHas(claims, "raw_claims") && std.objectHas(claims.raw_claims, "firstName") then "firstName" else null]: claims.raw_claims.firstName,
      [if std.objectHas(claims, "raw_claims") && std.objectHas(claims.raw_claims, "lastName") then "lastName" else null]: claims.raw_claims.lastName,
    },
  },
}
Onboarding portal
Before proceeding, ensure you are on a plan that supports onboarding portal. It is available exclusively on select enterprise plans. The portal requires that you enable Account Experience 2.0. Please contact us Ory Support if you have any questions or feedback.
Onboarding portal is a powerful tool designed to simplify complex identity and access management tasks for businesses and their partners.
Streamline organization onboarding
The onboarding portal address the often-burdensome process of setting up and managing identity connections with external organizations. Traditionally, integrating with a customer's or partner's identity provider (IdP) for single sign-on (SSO) or synchronizing user directories involves manual, error-prone configurations. This often requires deep technical expertise in protocols such as SAML.
Onboarding portal aims to:
- Simplify complex integrations: By providing a self-service or guided onboarding experience, they abstract away the underlying technical complexities of SAML. This means IT administrators on the client side don't need to be SAML experts to connect their organization's identity system.
- Reduce onboarding time: Instead of lengthy back-and-forth communication and manual configuration, an onboarding portal link allows an external administrator to configure the connection directly through a user-friendly interface. This drastically reduces the time and effort required to establish new B2B integrations.
- Enhance security and control: Onboarding portal links are designed to be shareable without exposing sensitive information. The administrator receiving the link can configure their side of the connection securely, maintaining control over their IdP settings while establishing a trusted connection with your application.
- Enable Self-Service for Organizations: For SaaS providers, this means empowering your customers to self-onboard and manage their own SSO connections, freeing up your engineering and support teams. Support Scalability for B2B Models: As your application grows and serves more enterprise clients, manually managing each integration becomes unsustainable. These features provide a scalable solution for onboarding and managing a large number of organizational customers.
- Validate SSO Connections instantly: The onboarding portal includes the ability to immediately test the configured SSO connection. This allows IT administrators to verify that the integration works as expected before deploying it to their users, reducing troubleshooting time and ensuring a smooth rollout.
These features are relevant for:
- SaaS (Software-as-a-Service) providers: SaaS companies offer services to other businesses (B2B) or to businesses that then serve their own customers (B2B2C). This is crucial for enabling enterprise clients to use their existing corporate identity systems (for example, Microsoft Entra ID, Okta, Google Workspace) for seamless access to the SaaS application.
- Enterprise IT administrators: These individuals in your customer organizations are responsible for managing their internal identity providers and user directories. They use the onboarding portal to configure the connection to your application.
- Developers and architects building multi-tenant applications: These individuals implement robust and scalable identity management for applications that serve multiple organizations. Each organization has its own authentication and user provisioning requirements.
Current limitations:
- The initial version includes a guided walkthrough for a limited set of providers. OIDC support and additional providers are planned for future releases.
Manage onboarding portal links
- Ory Console
- API
Create a link
Go to Authentication → Enterprise SSO in the Ory Console and continue by configuring the selected organization.
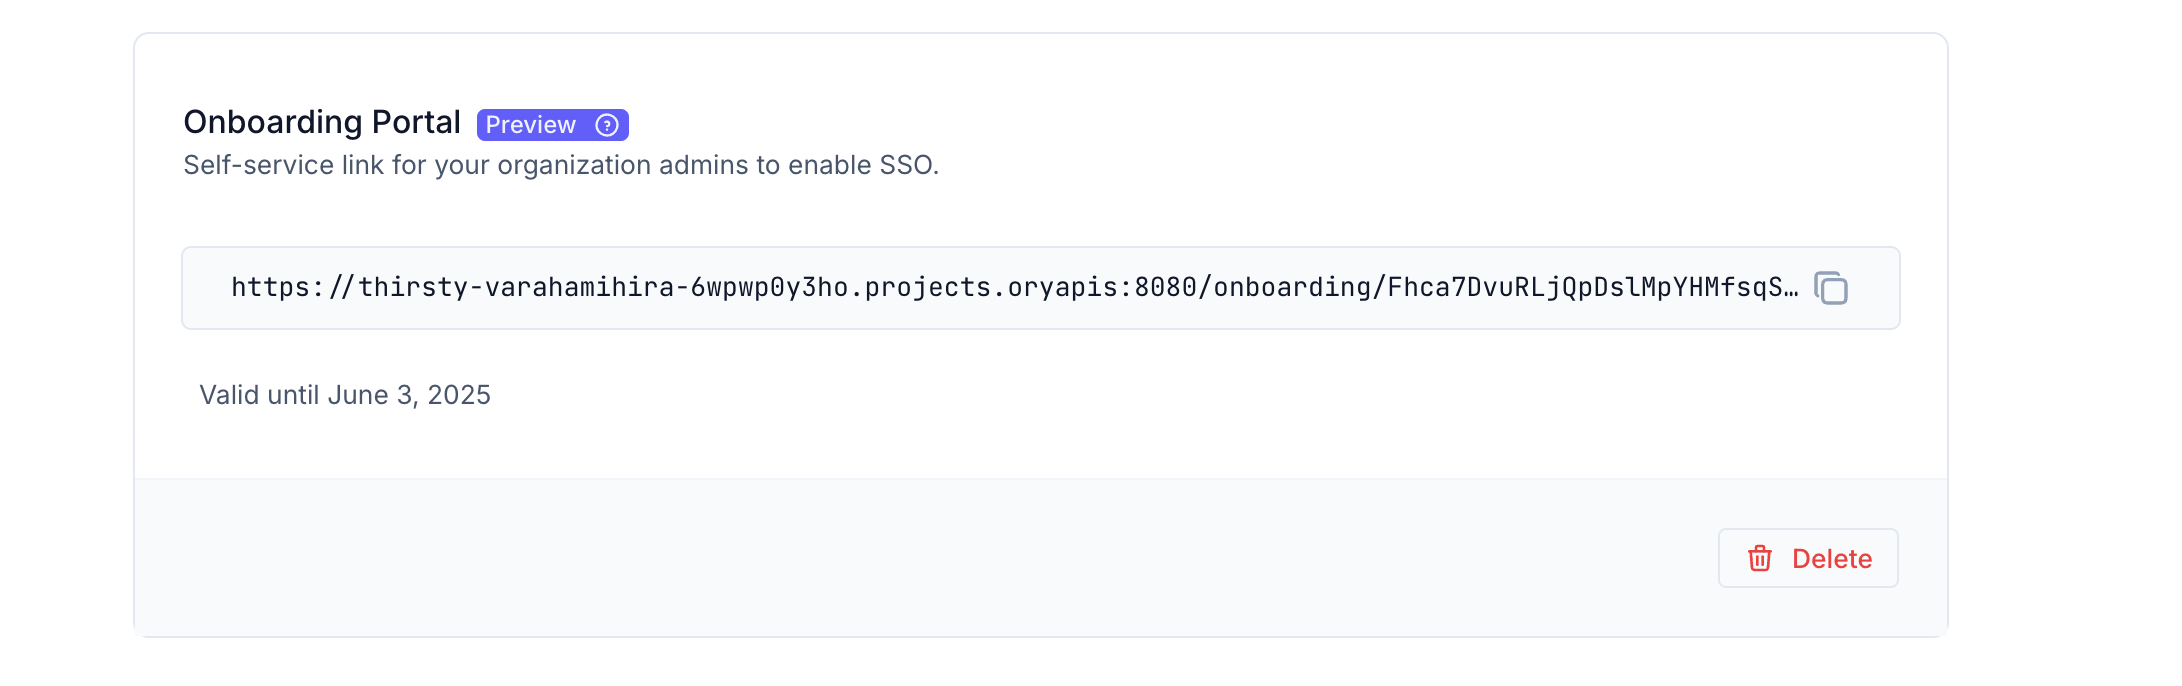
In the Edit Organization page, under the Onboarding Portal section, click Generate link to create a link. You can then share this link with the organization admins.
Create an onboarding portal link
curl -X POST --location "https://api.console.ory.sh/projects/$PROJECT_ID/organizations/$ORGANIZATION_ID/onboarding-portal-links" \
     -H "Authorization: Bearer $WORKSPACE_API_KEY" \
     -H "Content-Type: application/json" \
     -d '{
           "expires_at": "2025-06-01T00:00:00Z",
           "enable_sso": true
         }'
Result:
{
  "id": "d36ad207-e1a8-4eac-bc1b-c25e223cc15b",
  "value": "Fhca7DvuRLjQpDslMpYHMfsqSoy7vbI92PAxNlziZDidGBiW",
  "project_id": "836b03f7-fdce-466a-9407-8595a0f615ce",
  "organization_id": "517cc5e7-1ab6-4dcf-ba02-00fad003af92",
  "enable_sso": true,
  "created_at": "2025-06-02T05:23:45.299988Z",
  "expires_at": "2025-06-03T05:23:45Z"
}
The response contains a value token that you can use to construct the onboarding portal link as follows:
https://your-slug.projects.oryapis.com/onboarding/<value>
Delete an onboarding portal link
curl -X DELETE --location "https://api.console.ory.sh/projects/$PROJECT_ID/organizations/$ORGANIZATION_ID/onboarding-portal-links/$ONBOARDING_PORTAL_LINK_ID" \
     -H "Authorization: Bearer $WORKSPACE_API_KEY"
List onboarding portal links
curl -X GET --location "https://api.console.ory.sh/projects/$PROJECT_ID/organizations/$ORGANIZATION_ID/onboarding-portal-links" \
     -H "Authorization: Bearer $WORKSPACE_API_KEY"
Result:
{
  "links": [
    {
      "id": "d6458578-dbeb-45ee-95e7-3b98168ff313",
      "value": "eHSoZlTTffFP76ns0DOqBI8CT2daCXqRqO3MSVFi7eEbaRIu",
      "project_id": "836b03f7-fdce-466a-9407-8595a0f615ce",
      "organization_id": "517cc5e7-1ab6-4dcf-ba02-00fad003af92",
      "enable_sso": true,
      "created_at": "2025-06-02T05:44:24.883665Z",
      "expires_at": "2025-06-03T05:44:24Z"
    }
  ]
}
Expiry
The link generated from the Ory Network Console expires in 7 days. The API allows you to set an expiration value. Once the link expires, it no longer works. You can also delete the link and generate a new one.